In this article you are going to learn how to do complete SEO settings for your blog so that Google search growling software or the program is going to be able to crawl your website and they are going to place your blog postings in Google search results so in this article, we are going to cover-up :
1) how to work on this title section
2) how to add our description into the website
3) how to work on Meta Description which will help Google crawlers to Crowl our website
4) find more information about our website to place into the Google search results
we are going to work on these crawlers and indexing section where we are going to talk about Google's search console and see the process of adding our website into the Google search console and then we are going to add our custom robots.txt file and then we are going to do the proper setting of custom robots.
How to add Tittle and description ?
We have to click on the 'settings' in your blog and then we are on this 'basic' settings page ,so as you can see on this basic part we have got the 'Tittle' and then the description of our website. So my website title is already been added "studybuddylearn" so if you want to edit it, click that editing option on it and then you'll be able to add your text and after that you have to give your description of your website, so you can have 500 characters maximum so your description should have less than 500 characters or exactly 500 and then click on Save Changes and this description should have some information regarding your blog contents
How to work at privacy settings?
we have to go to privacy settings option and make sure that you added these features(keep it ON) in your blog. After that let's search engines find your blog. Then your website will be shown on Google search results, Yahoo search results or whatever search results available. So make sure you have selected this one too yes and click on Save Changes.
How to buy domain?
If you are a beginner and you choosed blogging is your career or you wishing to grow your website in future, then you can buy your own custom domain. If your only motive is to learn then I suggest you to work with free domain but if you are working in free domain, then after getting Adsense, you converted your free domain to custom domain then again you want to apply Adsense approval.
Steps to buy custom domain:
Step 1: Click custom domain
Step 2: Click 'BUY A DOMAIN'.
Step 3: You have to type website URL and select the ending (Ex: .com, .in, .social, .guru, .today, etc) but. mostly try to buy- ".in "and" .com"
Step 4: A new page will be open in that you have to fill your information are:
-Name
-Address(only one address can be filled)
-city, state and pin code.
-phone number & gmail
-Make sure that you seleted "privacy production ON"
-if you want to receive email message of tips and every updates, then select final option.
Step 5: New page will be opened, it is for renewing your domain automatically after expired (I suggest to you skip it because after 1 or 2 years based on you recharging now, after expiring it will recharge from your bank account automatically. So after expiring recharge manually base on your interest).
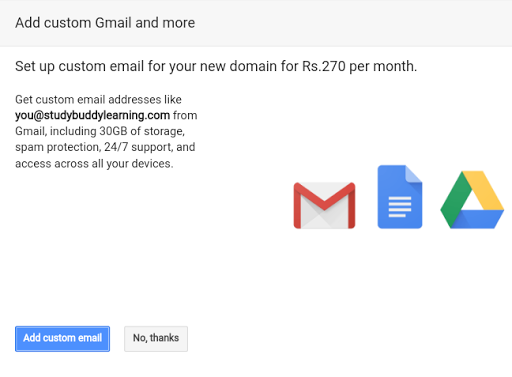
Step 6: If you want to make your Domian as custom Email (Example: you@studybuddylearn.com , india@studybuddylearn.com) then can pay Rs.270 per month or you can skip it by clicking "No, Thanks ".
Step 7: you can pay amount by credit or debit card.
Step 8: After buying custom domain again you have to click custom domain.
Step 9: register your domain and save it.
What is the use of HTTPS ?
Make sure that HTTPS option is selected (ON), Because HTTPS shows your website is secured while http means your website is not secured. Mostly viewers will not visit (http://)site.
How to modify Meta tags:
click on this Meta tags page and here on this page enable search description and we have to add our meta tags or meta description. It helps users to click on your blog in search results by writing a complete summary of what your blog is all about and use many key words. So it is on disable mode but we have to make it enabled. let's click on edit and then you are going to see this field where we are seeing an example at blog about social networking web design and if the character should have maximum 150 characters. So this will help Google search console to get a good understanding about your website and they will be able to show your posts in Google search results and click save change.
Notice that you should not do any changes in erodes and redirects
How to work at Crawlers and indexing ?
In crawlers and indexing section, we can see here warning- use it caution so if you don't know yet or if you are actually a complete beginner and if you never ever worked in it you should have more attention here, in this product if you make little mistakes in this spurt your blog site could be hidden from Google search results so make sure you are following all the steps that I am going to show, so that you won't make any mistake here in this part . let's go for this google search console
Create search console account :
this is for indexing or actually for crawling your website from Google servers or algorithm so let me just click on this google search console section here and it is going to take you to the webmaster tool and then you have to sign in using your email address and click on next so now as you can see here domain name we want to add our domain so let's just copy the domain name of our website and paste that url and click on ok .we have to remove this HTTP or HTTPS part and after that we have to click on continue and here we go ownership auto verified and our site has been added here as you can see verification method and then ownership verification everything is all fine with this website and we have added our website into Google search console .so let's click on go to property and now we have got our website listed here automatically as we have signed in into Google search console with our email address which is associated with this blog.
Step by Step method; -
Step 1: Click Google Search console.
Step 2: Sign in with your gmail account.
Step 3: new tap will be opened,in that you have to type your URL(it can be free Domain or custom domain) Here I am giving Example with my own site(do not add https://or http:// ):
For free domain- studybuddylearn.blogspot.com
For custom domain- studybuddylearn.com
Step 4: click continue.
Step 5: click "go to property". Then your search console account will be created.
alright so now we are done with Google search console now we'll be able to see the performance of website and fetch it from our Google search console so that
our start shrinking process are going to index.
create a sitemap for your blog:
Next you can see enable custom robots.txt, So let's enable it and down to it click on custom robot.txt edit option (in this you need to fill sitemap for your blog)
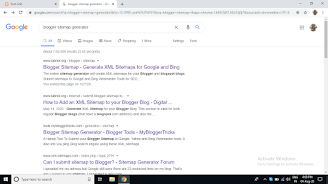
because our post need sitemap for indexing in google.So that go to google and typr "Blogger sitemap generator". Go to the first website and you can copy
and paste or type your blog URL and click generate botton. Your sitemap will become ready you have to copy that text and paste it in " custom robot.txt",This
will create sitemap for first 500 post in your blog.
Step 1: Go to google and search " Blogger sitemap generator".
Step 2: Click the first website and past your blog URL and click "Generate sitemap"button.
Step 3: Copy that sitemap
Step 4: Click "custom robots.txt" and paste that text here.
Next is very important ,so follow my instruction carfully, now you have to enable the "custom robots header tag"
Step 1: click "Home page tag"-in that enable only 'all' and 'noodp' (save it after enabling).
Step 2: Click "Archive and Search page tags"-in that enable only 'noindex' and 'noodp' (save it after enabling).
Step 3: Click "Post and page tag"- in that enable only 'all' and 'noodp' (save it after enabling).
Home page- it should be crowd by Google so let's click on 'all' and after that we don't want any directory page to be
indexed so let's click on 'noodp'.
Archive and search pages -if you want to get your archive insert search page whether it should be indexed or not indexed, you can select this from here
as well as if you don't want. So we can select on these 'noindex' and after
that select 'noodp'.
Posts and pages- so we want all of our future posts and current post
should be indexed for Google search console so what we have to click on this 'all' and after that we don't want to get any directory page indexed
so we can select this 'noodp'.
Finally save all the changes you did in your seo settings. Now we have completed our full seo settings in our blog.


0 Comments